Most homeschoolers rely on their computers. We use them for:
curriculum
research
creating
communicating
worship (I play a family worship CD on our computer)
and much more…
The problem is neglecting our computers until they give us fits.
This week’s challenge is all about making sure they work for our homeschools and not against them.
#1 Create a Safety Plan
We took steps to keep our photos and videos safe during the Memory Keeping Challenge. This week, we will take steps to protect our other valuable files: documents, records, music, contacts, and more.
Fortunately, most computer programs have automatic backups these days. Unfortunately, some programs require you to indicate that you want automatic backup ON in your settings. Never assume that your files are being backed up — that goes for your mobile devices as well. Take a few minutes to make sure they will be there if your computer isn’t.
Determine how to back up files. I prefer to have files backed up online. I use Dropbox for many different kinds of files. If you’re comfortable with your files being backed up online, add at least one more level of safety. My huge list of Gmail contacts became corrupted. I hadn’t made a backup of them. Never trust an online account to be your only backup of vital information. You may want to consider an external hard drive (or two) as a backup.
Make sure your security software is up to date. Anyone who’s had a computer completely destroyed by viruses (me!) will tell you that it pays to download the latest version of your software program of choice.
Create a safety plan for your kids. There are many excellent methods of limiting kids’ exposure to online predators and pornography. I’ve reviewed many of them. But I believe the most effective method is educating our children.
Explain to kids that there are unscrupulous people who would like to exploit their natural curiosity and desire for relationships. Clicking on an ad or sharing personal information can lead to unintended problems. It’s really important to tell children that if they do come across pornographic material or give personal information to a stranger, that you will NOT be angry with them. Instead, you want them to tell you, so you can prevent the incident from becoming a serious problem.
Of course, this kind of education should be ongoing with information and discussions taking place when children reach a new stage of development. This video addresses internet safety in general.
#2 Maximize Performance
You need all your patience to teach and parent; you can’t afford to deal with a slow computer, too.
If you have a slow internet connection, spend some time researching an economical option. And don’t be afraid to pray! We had problems with our network for months until a friend at church, who works for our internet company, saw my Facebook update about it. He sent someone out who finally determined and fixed the problem.
Educate the kids not to agree to download extra adware when getting games or software online. This has been a primary cause of slowness on our PCs.
A messy computer desktop can be just as overwhelming as a cluttered work space. If you’re using a PC, you don’t really need those program icons. Deleting them shouldn’t delete your programs, which can be run from the task bar or start menu. Everything in its place applies to computers, too.
The quickest way to clean your desktop is to create a folder and label it archive. Drag everything into it that you think you may need and go through it later when you have a folder system set up. Mark Hurst describes this approach in his free Kindle book, Bit Literacy .
Use a desktop wallpaper. IHeartOrganizing shares a file-naming strategy and pretty desktop wallpaper (just a photo that you set as your desktop) that you can use for organizing files you’re actively working with.
#4 Declutter Unneeded Files
Take 15 minutes and delete files you don’t need. To make this practice easier in the future, consider having a “To Delete” file. I often download files I know I won’t need later to this folder.
As homeschoolers, we can find it difficult to minimize the collection of stuff. Here are a few reasons why:
Books are often our greatest treasure; we can’t imagine giving them away
We may have more than one child or might have, so we figure we will need the toys, the clothing, and the curriculum again soon
We need to save two-liter bottles, empty milk containers, and toilet paper rolls for those experiments and crafts that use “what you have on hand”
We may do unit studies and could use just about anything as a prop or costume
We don’t want to waste money living on a single income or just to be good stewards
Although we can come up with good reasons to keep our stuff, there are also good reasons to get rid of it:
If we keep buying bookshelves, we will have to buy a larger house
Organizing hand-me-downs can be very time-consuming
If we save too many recyclables, we might start thinking that having 20 cats is normal, too
It’s no use saving so many things to use for unit studies if we can’t find them
Clutter can cost us emotionally, socially, financially, and spiritually
We can’t clear years’ worth of clutter in a week, but we can get a good start on it. This week:
#1 Make a List of All Gifts Received for Christmas
I receive a few gifts for Christmas, but I buy most of my clothing and other items I need at the end of the year because of sales. If I don’t declutter as much as I take in, it won’t take long for me to look like a hoarder. The same goes for the kids.
Enough time has gone by that it will be an interesting exercise to have your children make a list of everything they’ve gotten during the Christmas season. I’m providing a form for subscribers for this purpose. If they can’t remember, what does that tell them about the real value of things?
#2 Collect Items to Declutter Based on Your Gifts Received List
The idea is to do a one-in, one-out exchange. If you got a new sweater, an old one is decluttered. If the kids got a new game, an old one is given away. If you can’t do that for some reason, just declutter any item in exchange for the new one received.
I had a very difficult time with this where the kids were concerned for many years. One child would get a toy as a gift and everyone played with it. This is great until it comes time to declutter. The teen no longer cared about the younger kids’ stuff, so he would want to declutter it, much to his siblings’ dismay.
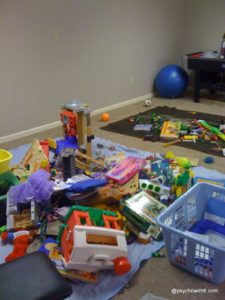
I now lay two blankets on the floor when we are decluttering kid stuff. One blanket is for anything any child wants to give away. The other is for trash. The kids enjoy going through their stash of toys and games and putting items on the blankets. As a child sees something on the blanket he wants to keep, he rescues it and returns it to storage. As the process continues, he may change his mind and return it to the giveaway pile, however. Sometimes kids are ready to release things when they feel free to choose. I may also rescue items from the blanket that I want to sell or keep for grandchildren (I’ve changed my mind about many of these latter items with my husband’s encouragement.)
#3 Put Unwanted Books/Curriculum Aside or List for Sale
Once, when I had more books than bookcases, I went through boxes of books while on the phone with a friend. I would explain to her why I was keeping each book. It wasn’t long before I realized that I didn’t need to be everyone’s library. So much of the time I was keeping books in case someone wanted to borrow them. I encourage you to ask yourself why you’re keeping books and release those that hold no interest, no sentimental value, or will not be read again.
Can we talk about releasing curriculum now? It’s tough to admit you spent hundreds on something you hate or that your kids will never be cute little kindergartners again, but you’ll have so much more peace in your homeschool when it’s out of sight. If you declutter something you end up wanting again, you can always buy it (or borrow it) again.
At this point in the school year, you know which materials you purchased that just aren’t working. Box them up to sell at spring or summer used book sales or list them for sale now. Check out my post on the best places to sell used curriculum.
#4 Deliver Unwanted Items to Charity, Consignment, or the Post Office
Unless you’ve determined that later in the year is a better time to offload your unwanted items, do yourself a favor and send them to a new home as soon as possible.
In our area, many charities will pick up donations. I usually prefer to free up space by sending my husband to the drop-off location (which he gladly does).
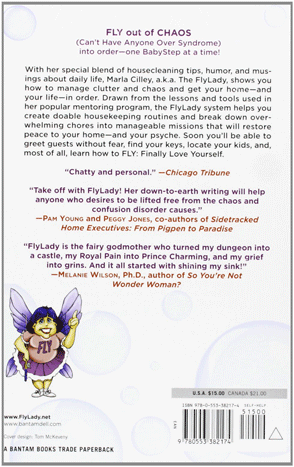
My favorite resource for decluttering inspiration is FLYLady.net or her book, Sink Reflections. My one claim to fame is that I have a blurb on the back.
Everyone has the challenge of keeping photos, video, and other memorabilia organized, but for homeschoolers, it’s an even more important undertaking.
These memories may be used as part of our homeschool record keeping. We may not have yearly photos or a yearbook to rely on. We may have many children or many activities to document. When you add in memories that predate our homeschooling to the to-do list, it can be easy to feel overwhelmed.
But the goal of having memories in a form that can be enjoyed now and in the future is a worthy one. So where do we begin?
#1 Discuss and Choose a Method for Organizing Memories
Today we have many options for keeping photos, videos, and even memorabilia organized and accessible. That’s the good news. The bad news it can be harder than ever to decide the best way to keep your memories. Talk with your family about the method they prefer.
Keeping Memories in Acid-Free Organizers
Many experts recommend having prints made of your best photographs, rather than relying on digital media that may fail. Even if you prefer not to get prints, you likely have a number of older photos that haven’t been safely organized. If that’s the case, I recommend a Cropper Hopper Photo Case which can hold up to 2000 photos. I have a number of these cases and use them to organize my photos by topic. This method has allowed me to find old photos quickly.
Displaying memories can be creating a detailed scrapbook, slipping photos into an album, or doing Project Life (my current fave) which is somewhere in-between.
You may decide that keeping your photos in a digital format is the best choice for you. I recommend Eye-Fi cards for automatic photo uploading. I also love that my iPhone automatically backs up my photos to Google+.
Would you like to have all your photos and videos in digital format? You can convert them at home with a scanner or a video capture device. Or you can pay for conversion through a service like FotoBridge. You can also shoot photos and video of bulky memorabilia that you don’t want to hold onto.
We display our digital photos on our kitchen iMac’s screensaver, but digital photo frames are another option.
#2 Purchase Materials & Move Memories to a Safe Place
You’ll want to purchase any materials or services necessary to help you preserve your memories (see the links above), but don’t wait to move your memories to a safe place.
At one time, I had photos in the basement. The basement is the most likely place to experience water damage, so I moved them to the main floor. Memorabilia should also be kept away from sunlight. Choose acid-free containers rather than shoe boxes. As soon as possible, plan to safely remove photos from magnetic albums that aren’t acid-free.
Digital memories must also be kept safe. I keep my photos and videos on multiple external hard drives as well as on a computer and in online storage. If you don’t have a system for backing up these memories, set one up today.
#3 Begin Documenting 2013 With Help
If you don’t know where to start, begin by documenting the past year. Collect photos and videos into folders by months. One of my favorite quick ways to document a year is by creating a calendar. Shutterfly offers a number of options for doing this. If you choose a 12×12 calendar, you can store the pages in a scrapbook when the year is over. This is a perfect project for kids, too. Even if all you do is organize the past year’s digital photos and videos by putting them into folders, you’ll be a lot more organized.
#4 Choose a Top Priority Project and How to Complete It
Besides organizing memories from the previous year, choose another project that you’re motivated to complete. I have a son who is graduating from high school this May, so completing his school years scrapbook is a top priority. You may have an event that you’d like to make special by having memories on display.
Decide together what to tackle first and then determine how everyone can help. Young children can slide photos into a book. Older kids can learn to edit videos.
Want more help organizing your photos? Organized Photos is my favorite website.
I would love to hear what your top priority is for memory keeping.
I’m a Christian psychologist turned homeschooling mother of six. My life can be a little crazy, so I look for sanity-saving ideas to use and share. I hope you’ll read my About page to learn more.


 Most homeschoolers rely on their computers. We use them for: