Hospitality has always been an important part of my life. When I was a child, I looked forward to family get-togethers and parties in our home, whether we were living in a bigger house in a small town, a double-wide trailer, or on a farm. We never spent a lot of money to entertain, but we always had a good time.
Entertaining is still a frequent activity in our homeschool. We host family holidays, kid sleepovers, and other families for co-op classes. The lesson we want to impart to our children is that people are worth the time, money, and effort that hospitality requires. This week, we will get organized so we can invite people (or more people) into our home.
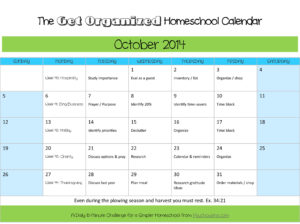
#1 Study the importance of hospitality
Even if you entertain often, it’s worth studying what the Bible has to say about hospitality with your kids. Of course, the most powerful lesson is what we model to our children. Real Life at Home has some ideas for getting kids involved in hospitality.
Years ago, I used materials provided by Sweet Monday to host neighbors in my home. I still enjoy good relationships with my neighbors as a result. But you certainly don’t need a program! A friend and I invited a homeschooling mom to our homes who wasn’t a believer over the course of a year. She recently shared her new faith in Christ with us! What a powerful witness hospitality is in this age of I’m-too-busy and I-don’t-have-a-Pinterest-ready-home.
I read an article about a family who serves meatballs to whomever would like to join them every Friday night and I was inspired. I shared the idea with my children who weren’t too crazy about the meatballs-and-company-every-Friday-night idea. I realized that neither aspect of the idea is required. I am going to ask the kids about hosting a monthly get-together with a more varied menu instead. Ask your children for their ideas about hosting friends, family, and acquaintances in your home.
Explain to your children that you are all going to pretend that you are going to be overnight guests in your home. Take a notebook and pen with you and take notes on things you’d like to change.
Is there a place to hang your coat or put your belongings that is out of the way?
Is there a comfortable place for you to sleep?
Are there extra items you will need readily available (towels, toiletries, lamp, glass for water, alarm clock?)
Is the guest’s bathroom clean?
Are the rooms cluttered or so perfect that your guests will be uncomfortable?
Does the entryway say welcome?
Do you have any seasonal decorations, photos, or books displayed that invite guests to look?
Are there any parts of your home that need special cleaning or maintenance attention?
#3 Inventory your home for entertaining items and list needs
It’s easy to think we need a whole new kitchen or new furniture before we can entertain. But until there is time and money for the changes we’d like to make, there are simple strategies for making our home inviting to guests.
First, see what you already own that can be used to give entertaining areas a fresh look or to host guests overnight. Look for decorations, tablecloths, and bedding. If you don’t have what you need, ask friends if they have any unused items. Entertaining items are one of the biggest source of clutter!
If you don’t have what you need and you can afford some extra items, add them to a shopping list.
#4 Organize and shop
Organize what you already have. Get out the seasonal decorations and display what you love. Throw an afghan over a worn sofa and use candlelight to give the room a soft glow. Decluttering and rearranging can have a dramatic effect, too. Display some treasured photos or put out an old book that you love. The Inspired Room has some encouragement for those of us who want our house to be decorated NOW.
Collect sheets, pillows, blankets, air mattresses, extra toiletries, and towels and keep them in an entertaining space, so hospitality is less stressful. If you already have a guest room (yay you!), take some time to freshen it up.
If you need to shop, you may wish to wait until the Thanksgiving season begins to buy some items, as so many entertaining articles go on sale that time of year. Be sure to check out my Fall Inspiration and Organized Homeschool Pinterest boards for more ideas to help us practice hospitality this season.
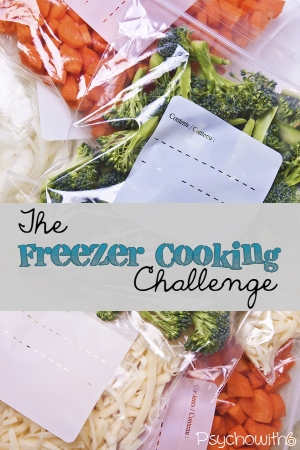
There are few sanity savers with more impact than having homemade meals in the freezer. The problem is getting them there! This week we’ll take on that challenge so you can have more stress-free nights this fall. Let’s get cooking!
#1 Decide on an approach
When we think of freezer cooking, we tend to think of it as an exhausting marathon. And it absolutely can be one! I have spent hours shopping one day and another day on my feet cooking. I have had the problem of not liking the recipes (be sure to see the meal planning challenge or my free meal planning ebook for how to fix this!) or of being downright phobic of ever repeating the process again!
Fortunately, there is another way. Just as you don’t have to go from the couch to marathon running, you can start off slowly when it comes to freezer cooking. The simplest approach? Make a double batch of a favorite, freezable meal and pop it right into the freezer. I love it! Unless you do this a lot, you don’t even need a lot of freezer space.
As you get comfortable, you can freeze more of the same meal (at one point I was making eight batches of one dish a week–something I could never do now that I have teenage boys!) or you could freeze a smaller number of meals, often made for the same cooking approach (like the crock-pot) or using the same kind of meat.
Yet another alternative is to work with a friend either to assemble the meals together or to make different options and exchange. I’ve talked about doing this many times, but haven’t. If you have, I’d love to hear what you think!
If you’re not sure where to start, I encourage you to start with doubling once a week and work up from there.
#2 Choose recipes and create a shopping list
If you’re going to use a pre-made plan with recipes and a shopping list, this part will be easy. But remember how much time and money could be wasted if you don’t like the recipes! Even if you double a new recipe, it will be disappointing if you hate it. I will say that I have been very happy with the freezer cooking plans from Saving Dinner. But we’re all different!
If you’re going to make your own favorites for the freezer, consider meals you like having regularly or meals that require more preparation. I always freeze homemade lasagna, because it does take more time. Then I can either enjoy it another night, or I have a perfect meal to bless someone else with.
If you’re not sure if something you like would freeze well, consult this link.
Once you have your recipe(s), you’ll need to create a shopping list. Be sure to include freezer bags or freezer containers for your meals! There are a number of options for creating that list (including good old-fashioned paper), but I am in awe of the new option available at Plan to Eat [affiliate link]. Plan to Eat will not only generate a shopping list for you based on the recipe you’re making, but will keep track of how many of the same freezer meal you’ve planned on the calendar. Check it out!
#3 Shop and prep
If you’re going to do a marathon freezer cooking session, you’ll need extra time to shop and possibly some help, depending on the size of your family. If you’re just going to double up on a meal, you’ll be able to do your regular weekly shopping with no problem. On Plan to Eat, if you just want to make two batches of a recipe, just double the servings and your list will be updated in turn.
Even if you aren’t freezer cooking, it’s a great idea to prep for the week’s meals when you get home from the store. Get fruits and veggies in ready-to-eat shape. Brown hamburger and put chicken in the oven. If you will be doing a big freezer cooking session, prepping items today will make it less likely that you’ll collapse tomorrow!
#4 Assemble your recipes
If you’re doubling up on one recipe, this will be easy peasy. If you’re doing a marathon session, you’ll be thankful you set up everything you need in advance. Put out the measuring cups, markers, freezer bags, etc. I put on an apron and line plastic pitchers with freezer bags for assembly. It makes it so easy!
If you have kids who are old enough to help, let them! If not, and you’re prepping a lot of meals, see if you can get child care help. I’ve asked my husband to take the kids out for fun with him when they were younger. It worked great!
One more thing: if you’re going to do an all-day cooking session, make sure to wear good, supportive shoes. If you’ve ever done it, you know why!
Have you ever done a big freezer cooking day? What did you think?
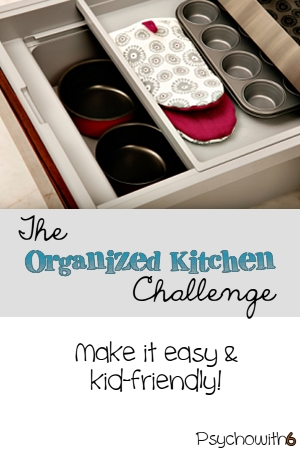
Homeschoolers tend to spend a lot of time organizing their school spaces and that makes sense. But it also makes sense to organize the most-used room in your home. This week we will focus on making our kitchen kid-friendly, so kids can help themselves, and you can save time.
#1 Organize dishes and cups
The younger your children, the more important it is to put children’s dishes where they can access them. Even though my youngest is now eight, I still keep all of the plastic cups in a big bottom drawer next to the refrigerator. It’s really fast to throw them all in there when the dishwasher is unloaded. Where is the most time-saving, accessible place for you to store kids’ plates and cups?
At the same time, it’s important to store dishes you don’t want your kids to use out of reach. I bought over-sized bowls (I ADORE Corel dishes) and while I love them for certain things, they take up way too much room in the dishwasher. I also don’t want the kids using them for cereal. I’m spending a fortune on cereal already. So I put these bowls up high.
#2 Set up snack centers
I think my kids are more interested in what they will have as a snack than just about anything else. I can’t really blame them! I love a good snack, too.
This week, you will set up an organized, fix-it-and-forget it system for kids to (hopefully) get their own snacks depending on their ages. First, you may need some ideas for healthy snacks. Here is a list of 50 ideas. Then you may wish to portion them in individual servings and store them in the refrigerator or in a plastic bin. That may be all you need to do today!
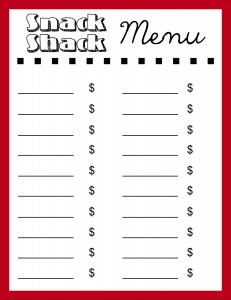
But if you have a child who turns his nose up at fruits and veggies, you may want to set up a snack shack for the kids. A fellow homeschooling mom shared the idea with me years ago and it’s ingenious. Here is how it works:
Make up a menu list of snacks that you will have on hand, including the less healthy options your child likes
Set prices for snacks, making fruit and veggies free and less healthy foods more expensive
Give kids paper money for the week (I gave my kids $5 a week)
Turn any leftover money at the end of the week into real cash
If you’d rather not take the time to operate the snack shack yourself, you could put an older child in charge. To make this an educational activity, shop with your child for snacks and use an app like Fooducate to determine what the prices should be for various snacks they like. If you have a child who doesn’t eat enough, I don’t recommend the snack shack! I had boys who would go without snacks just so they could collect the money. Go figure.
If you’d like to give the snack shack a try, I’ve created a free printable for you. You may want to laminate it and post it on the fridge with dry-erase items and prices. Or you may want to use permanent marker in case your child “accidentally” changes the prices!
#3 Move seldom-used items
My goal is for the kids to be able to help me as much as possible. If I have all kinds of pans and gadgets I never use cluttering up my kitchen, the kids will struggle to find what they need to make their own lunches and help make dinners. If you haven’t used something in the last year, either declutter it or get it out of the kitchen today. I store seldom-used items in my basement storage area. It’s better to have to purchase something you end up needing again than to waste time in the kitchen.
#4 Organize for kid cooking
Today, ask one of your younger children to help you cook. Pay attention to how you can put things at lower levels and label them, or put items where your child looks for them first. Take advantage of the space behind cabinet doors for listing what can be found there and use descriptive names kids understand like “spaghetti pot” rather than Dutch oven.
#1 Get the lay-out lists for the grocery stores you shop in
Near the front entrance of most stores is an aisle list for the most common ingredients. You’ll want this so you can put your shopping list in the order the items appear in your store. If a store doesn’t have one, take time to go through the aisles noting the numbers (if any) and what can generally be found there. You can also do this with a grocery shopping app.
#2 Create a master shopping list
If you did your meal plan on paper, you’ll now combine totals for all ingredients needed to make the meals on your plan. In other words, you’ll know you need 8 pounds of chicken breast total for the month. You may wish to create a paper grocery list that is organized according to the aisle layout you obtained.
If you’re using a digital meal planner like Plan to Eat, the shopping list will be automatically generated for you. However, depending on how you entered the recipes, you may find that some of the ingredients aren’t listed for the correct aisle. This is where your aisle list can come in handy! Make sure all items are categorized properly so you don’t have them listed in different sections.
#3 Finish creating shopping list
To save the most time possible, you’ll want to have a master list of non-food items to purchase as well. If you don’t know how many items like paper towels and laundry detergent you purchase in a month, make note of the date you purchase them next and the date you run out for future planning. When you know how much of something you need each month, you are better able to take advantage of coupons and sales for bulk shopping.
If you don’t feel like being that organized, you can continue to organize the shopping list for your meals and just add these extra items to your weekly shopping list as needed. Your weekly shopping list will be much smaller with the advance shopping you’ll be doing.
#4 Shop and put items away
When I do monthly shopping, I go to two stores and have multiple carts. I need a clean vehicle and a helper or two. I definitely need space cleared for storage and lots of help to put items away. I recommend shopping when you have the most energy! If you’re using coupons or shopping sales, make sure you have everything you need organized. Oh, and don’t forget your purse! Yes, I have done this.
When you’re done, you will have saved lots of time in the upcoming month and probably money, too!
Last week we cleaned out the pantry by making some recipes to use up those orphaned ingredients. This week we’ll decide what to eat for the next week or even next month, so we have time to do what we love best!
If you don’t have a copy of The Once-and-for-All Meal Plan, I invite you to get it when you subscribe. If you don’t like blog posts in your inbox, you can choose the weekly or freebies only option. When you read it, you’ll understand how to create one meal plan that will work for you and your family, no matter your taste or needs. Now on to this week’s challenge!
#1 List favorite dinners plus one new recipe
To create a workable meal plan, you need a list of meals your family loves that you know you’ll actually make. It’s no use for me to write down my husband’s family lasagna recipe. We love it, but it takes a long time to make, so I save it for special occasions. For this challenge, just write down regular weeknight meals that you like. You can definitely get the whole family involved in this week’s challenge!
After you have a list of regular favorites, write down (or pin) one new recipe that you want to try. I’ve created a form, called the What We’re Eating Form, to make this an easy process.
But what I love is how easy it is to add recipes to Plan to Eat (affiliate link because I’m crazy about it). If you’re like me and don’t have a recipe for some of your meals, search for a similar recipe on AllRecipes. When you find it, you can automatically add the recipe to your Plan to Eat recipes, modifying it if necessary before you save it. It’s easy with the Plan to Eat browser extension.
But here’s the really exciting part. You can also add new recipes you find on Pinterest to your list of recipes on Plan to Eat. Just click the pin to pull up the original recipe and use your browser extension to add it to Plan to Eat. I would love for you to follow my Dinner Recipes to Try Board on Pinterest. You might find a recipe you’d like to try, too.
If you have to manually enter a recipe to Plan to Eat, it’s so easy! But you can absolutely do the same with paper.
Repeat the first process for breakfasts, remembering not to add time-consuming recipes to your list, unless you will really take the time to make them. Of course I have a Breakfast Recipes to Try board, but what do you think of this Pumpkin Pie French Toast recipe? Yummy.
#4 List favorite snacks or desserts plus one new recipe
By now, I bet you’re getting the idea! If you have snacks or desserts, list your favorites and find a new recipe to try. If you follow me on Pinterest, you’ll see the snack and dessert recipes I pin and I find some great ones! When you’re done with this last step, you will have made great strides toward avoiding the indecision that can keep all of us from getting and staying organized.
The first step is quickly going through your pantry to throw out any expired items and set aside any usable goods that you know you won’t eat for charity. Work on one shelf at a time and wipe it down after you’ve emptied it.
If you want to take the time to organize the shelves, do it. Otherwise, just purge and wipe down!
#2 List items in pantry and freezer
Once you’ve replaced the items you’re keeping in the pantry, you’ll want to make a list of items that aren’t staples. For example, you won’t list flour, but you would list diced, canned tomatoes. I created a form for this purpose for you.
As you’re listing the items, you will have an idea of how to use them up. For example, if I saw canned tomatoes, I would write chili next to it. If you don’t know what to make to use up an item, leave that section blank across from the item.
When you’re finished with the pantry, you’ll do this with your freezer, too. You’ll write Freezer in the Location blank at the top of that form. Don’t worry. You don’t have to clean out your freezer, too, unless you have time. You’re looking for items that will help you make the meals you noted as you went through your pantry. So, if I see a package of precooked ground beef in my freezer, I will add it to the list. Across from it, I will write chili in parentheses to indicate that I have already found other items needed to make this meal.
This process sounds more time-consuming than it is. Set your timer for 15 minutes and see if you can’t knock it out!
#3 Find recipes
After you’ve done what you can, thinking of meals to use up pantry & freezer items, it’s time to use the power of AllRecipes. Before you look for recipes, open your Recipe Box. (Create an account so you can have one if you don’t already). Then add a folder called “Pantry Clean Out” or whatever you like.
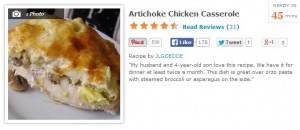
When you’re done, use the ingredient search–a feature I’m crazy about! Simply add the orphaned ingredients you’ve listed and search for top-rated recipes. Let’s say you found canned artichokes in your pantry and chicken in the freezer. Search and you might find this yummy recipe I can’t wait to try:
Add the recipes you want to your Pantry Clean Out folder in your Recipe Box. This is honestly the most fun part of the challenge! Continue with all of your items until you’ve found recipes for them. You’ll want to note on your list where you found the recipe. Use AR if you find it on AllRecipes.
#4 Make shopping list & shop
One column of the form is for you to indicate whether you are planning a breakfast, lunch, dinner, snack, or dessert (De) recipe. Completing this form will tell you if you need to plan any additional meals for the upcoming week or weeks.
You’ll also find a column for adding ingredients that you still need to make the recipes. This is perfect if you prefer a written shopping list. But if you want to make a shopping list directly from AllRecipes, just click on the recipes you’re shopping for and click+ Shopping List. Doing it this way will require you to check off the items that you already have on hand. If you have the All Recipes iPhone app, you can see the shopping list on your phone. If you have any items on your list that you may already have in your refrigerator, be sure to check.
I previously recommended AllRecipe’s Menu Planner that is available with their paid Pro Version. I now use Plan to Eat for this purpose. It requires the extra step of importing recipes you like into Plan to Eat, but it’s fast and well worth it. The planner and shopping list are a dream to use. The added benefit is that the site and shopping list are available on mobile, so you can be on Android with no problem. I love Plan to Eat so much that I’m an affiliate. What’s wonderful is you can give it a test drive for 30 days for free. If you love it, your subscription is as low as $3.25 a month.
I’m a Christian psychologist turned homeschooling mother of six. My life can be a little crazy, so I look for sanity-saving ideas to use and share. I hope you’ll read my About page to learn more.